- Body Parts Exercise Guides Body Fat Percentage Body Fat Estimation Caliper Table BMR Calculator
These exercises are mostly links and references to the www.bodybuilding.com website. Please check the original site for more detailed info and goodies.
Searching. Please wait...
Showing 721-735 of 1,081 items.
| Main Muscle Trained | Name | Alternate Names | Auxiliary Muscles | Equipment | Mechanics Type | Exercise Level | Sport | Force | Instructions | Alternative Exercises | Videos | External Url Info | Comments | |
|---|---|---|---|---|---|---|---|---|---|---|---|---|---|---|
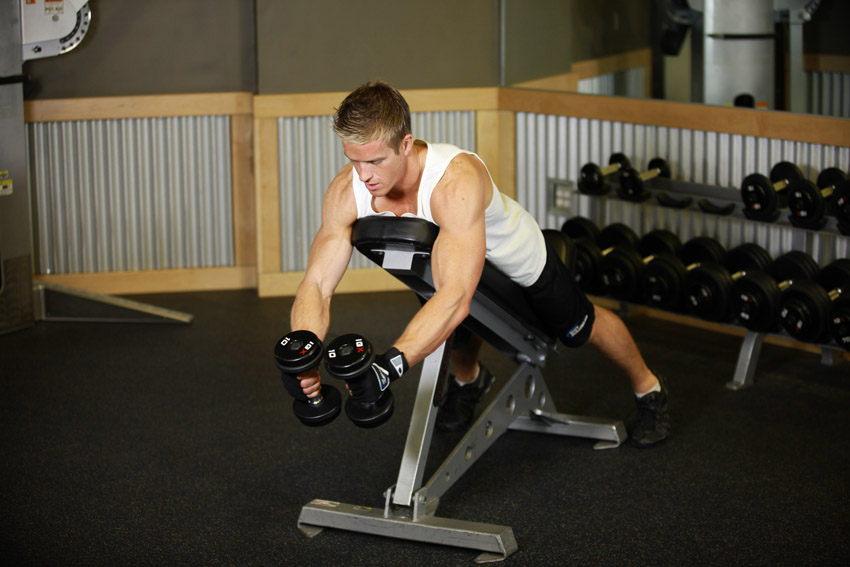 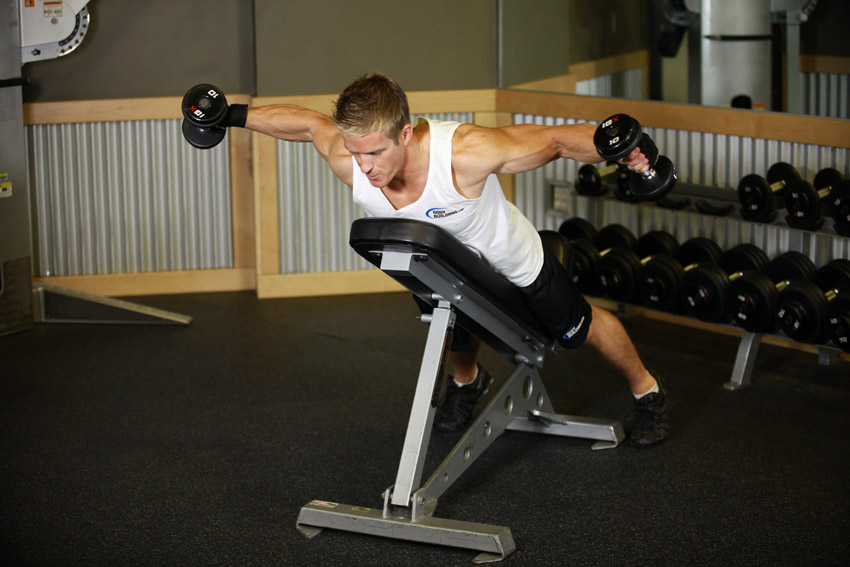 | 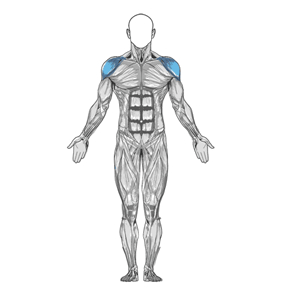 Shoulders | Reverse Flyes | (not set) | (not set) | 4 | 2 | Beginner | 0 | Pull | 1) To begin, lie down on an incline bench with the chest and stomach pressing against the incline. Have the dumbbells in each hand with the palms facing each other (neutral grip).<br /> 2) Extend the arms in front of you so that they are perpendicular to the angle of the bench. The legs should be stationary while applying pressure with the ball of your toes. This is the starting position.<br /> 3) Maintaining the slight bend of the elbows, move the weights out and away from each other (to the side) in an arc motion while exhaling. <br /> Tip:<br /> Try to squeeze your shoulder blades together to get the best results from this exercise.<br /> 4) The arms should be elevated until they are parallel to the floor.<br /> 5) Feel the contraction and slowly lower the weights back down to the starting position while inhaling.<br /> 6) Repeat for the recommended amount of repetitions.<br /> | Bent Over Dumbbell Rear Delt Raise With Head On Bench/ / Back Flyes - With Bands/ / Bent Over Low-Pulley Side Lateral | http://www.bodybuilding.com/exercises/detail/view/name/reverse-flyes | ||
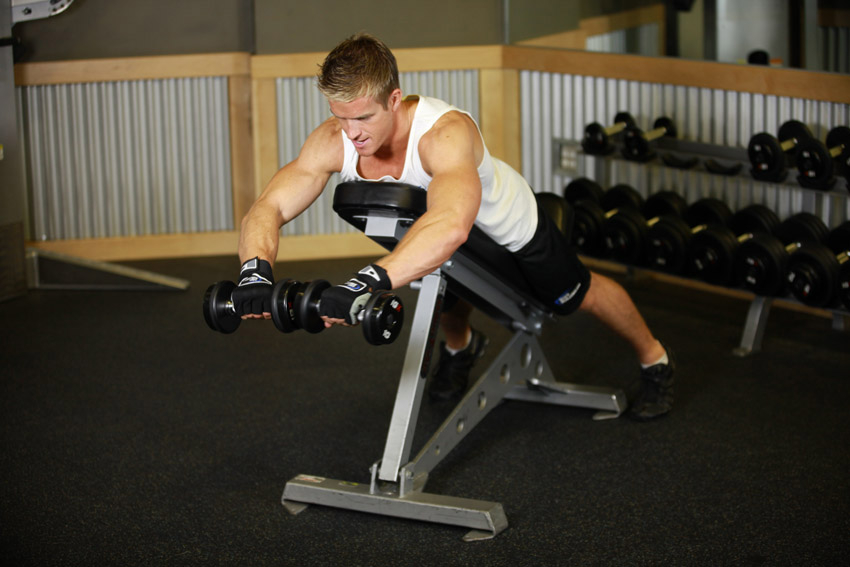 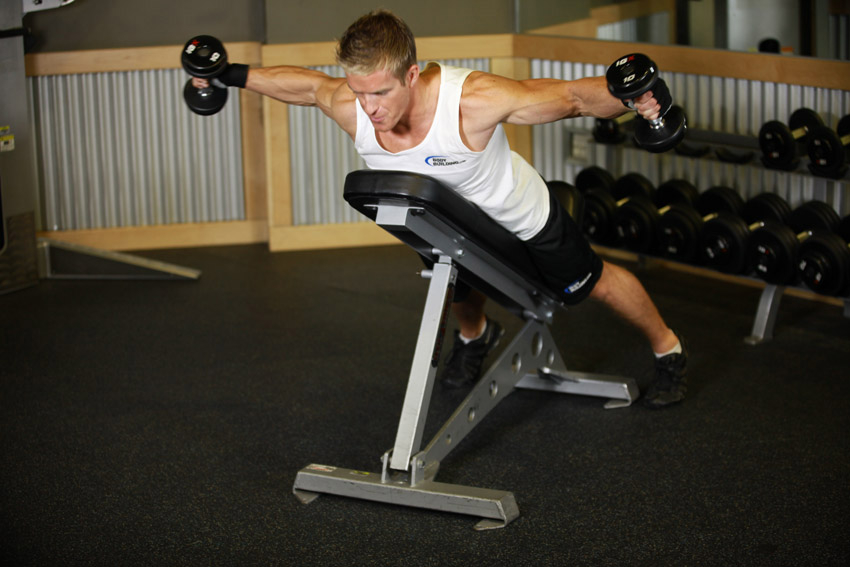 | 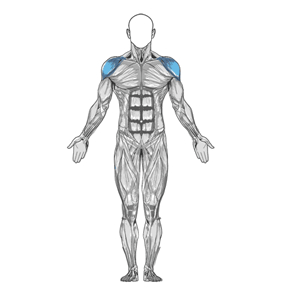 Shoulders | Reverse Flyes With External Rotation | ["Rear Delt Flyes"] | (not set) | 4 | 2 | Intermediate | 0 | Pull | 1) To begin, lie down on an incline bench set at a 30-degree angle with the chest and stomach pressing against the incline.<br /> 2) Have the dumbbells in each hand with the palms facing down to the floor. Your arms should be in front of you so that they are perpendicular to the angle of the bench. <br /> Tip:<br /> Your elbows should have a slight bend. The legs should be stationary while applying pressure with the ball of your toes (your heels should not be touching the floor). This is the starting position.<br /> 3) Maintaining the slight bend of the elbows, move the weights out and away from each other in an arc motion while exhaling.<br /> 4) As you lift the weight, your wrist should externally rotate by 90-degrees so that you go from a palms down (pronated) grip to a palms facing each other (neutral) grip. <br /> Tip:<br /> Try to squeeze your shoulder blades together to get the best results from this exercise.<br /> 5) The arms should be elevated until they are level with the head.<br /> 6) Feel the contraction and slowly lower the weights back down to the starting position while inhaling.<br /> 7) Repeat for the recommended amount of repetitions.<br /> | http://www.bodybuilding.com/exercises/detail/view/name/reverse-flyes-with-external-rotation | |||
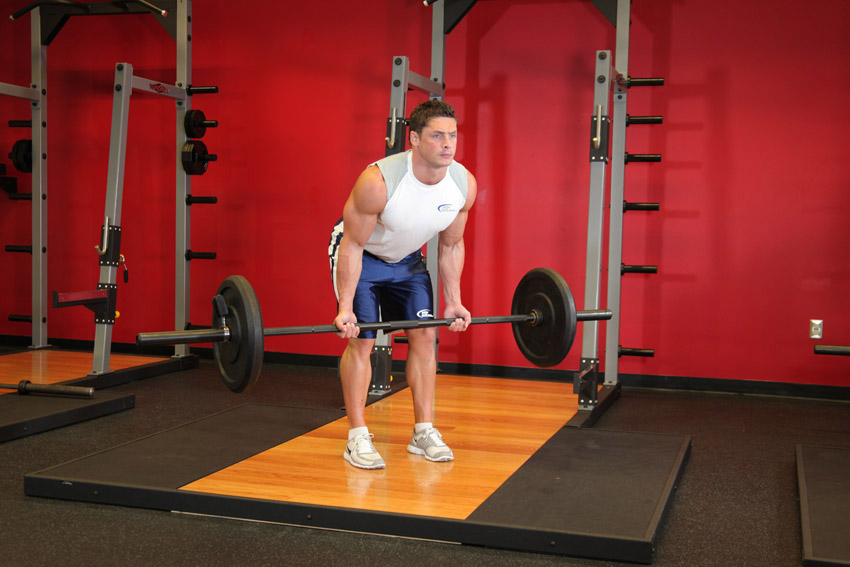 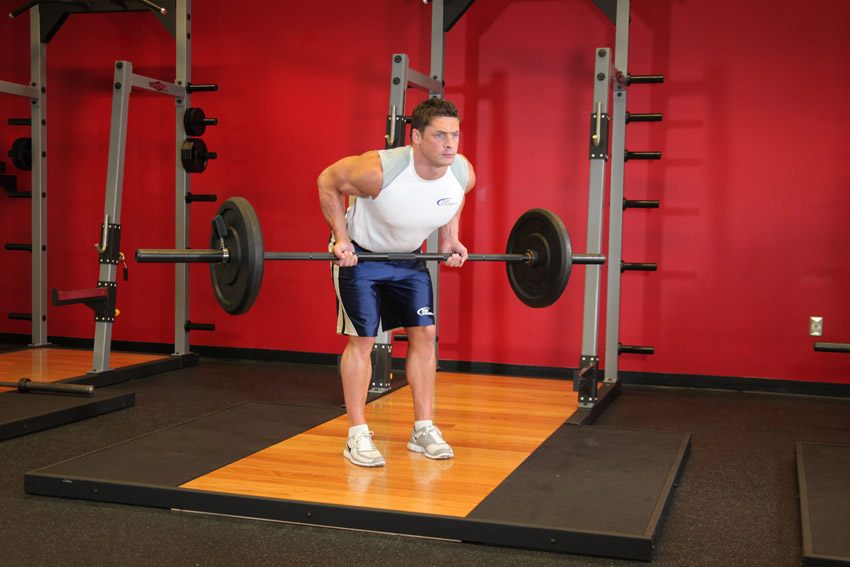 | 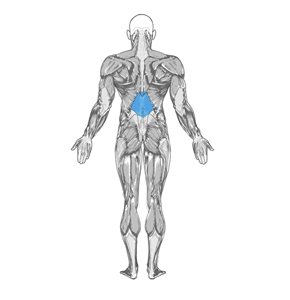 Middle Back | Reverse Grip Bent-Over Rows | ["Barbell Row"," Yates Row"," Reverse-Grip Bent-Over Row"," Reverse Grip Bent Over Row"," "] | [3,10,1] | 2 | 1 | Intermediate | 0 | Pull | 1) Stand erect while holding a barbell with a supinated grip (palms facing up).<br /> 2) Bend your knees slightly and bring your torso forward, by bending at the waist, while keeping the back straight until it is almost parallel to the floor. <br /> Tip:<br /> Make sure that you keep the head up. The barbell should hang directly in front of you as your arms hang perpendicular to the floor and your torso. This is your starting position.<br /> 3) While keeping the torso stationary, lift the barbell as you breathe out, keeping the elbows close to the body and not doing any force with the forearm other than holding the weights. On the top contracted position, squeeze the back muscles and hold for a second.<br /> 4) Slowly lower the weight again to the starting position as you inhale.<br /> 5) Repeat for the recommended amount of repetitions.<br /> <br /> Caution:<br /> <br /> 1) This exercise is not recommended for people with back problems. A Low Pulley Row is a better choice for people with back issues.<br /> 2) Also, just like with the bent knee dead-lift, if you have a healthy back, ensure perfect form and never slouch the back forward as this can cause back injury.<br /> 3) Be cautious as well with the weight used; in case of doubt, use less weight rather than more.<br /> <br /> Variations:<br /> You can perform the same exercise using a pronated (palms facing out) grip or using dumbbells.<br /> | Bent Over Two-Dumbbell Row | http://www.bodybuilding.com/exercises/detail/view/name/reverse-grip-bent-over-rows | ||
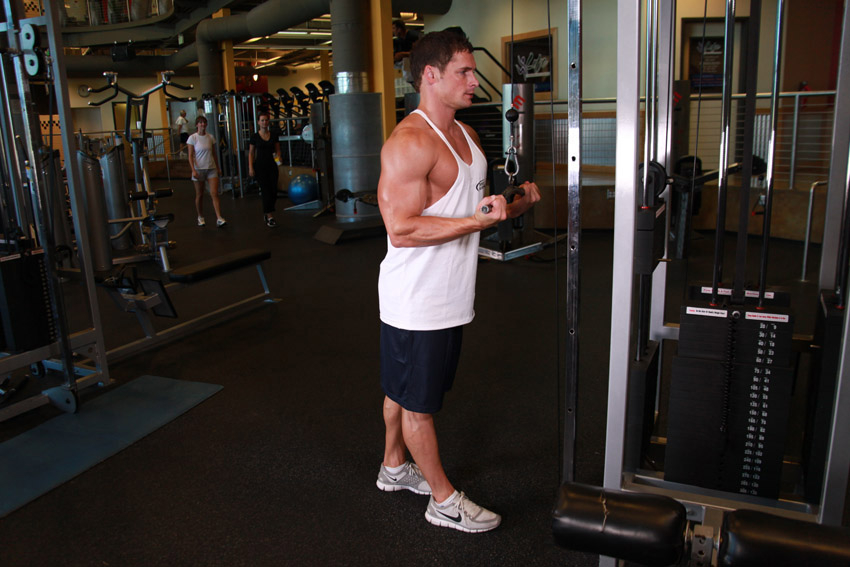 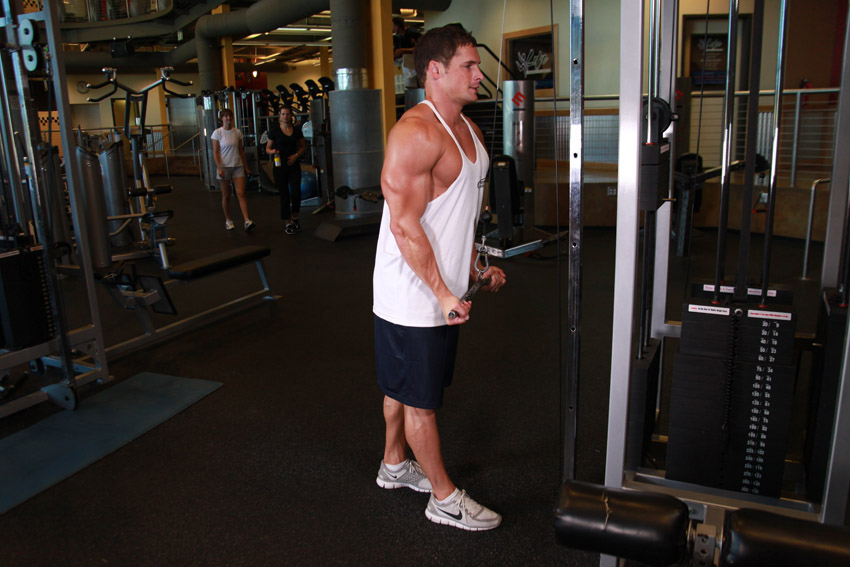 | 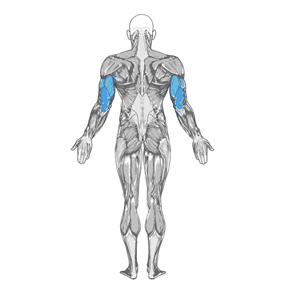 Triceps | Reverse Grip Triceps Pushdown | (not set) | (not set) | 3 | 2 | Beginner | 0 | Push | 1) Start by setting a bar attachment (straight or e-z) on a high pulley machine.<br /> 2) Facing the bar attachment, grab it with the palms facing up (supinated grip) at shoulder width. Lower the bar by using your lats until your arms are fully extended by your sides. <br /> Tip:<br /> Elbows should be in by your sides and your feet should be shoulder width apart from each other. This is the starting position.<br /> 3) Slowly elevate the bar attachment up as you inhale so it is aligned with your chest. Only the forearms should move and the elbows/upper arms should be stationary by your side at all times.<br /> 4) Then begin to lower the cable bar back down to the original staring position while exhaling and contracting the triceps hard.<br /> 5) Repeat for the recommended amount of repetitions.<br /> <br /> Variation:<br /> This exercise can also be performed with a single handle using one arm at a time. This will allow you to better isolate the triceps. With this version you can self spot yourself by placing your hand over your forearm and applying some pressure to help you perform more reps than before.<br /> | Cable One Arm Tricep Extension/ / One Arm Supinated Dumbbell Triceps Extension | http://www.bodybuilding.com/exercises/detail/view/name/reverse-grip-triceps-pushdown | ||
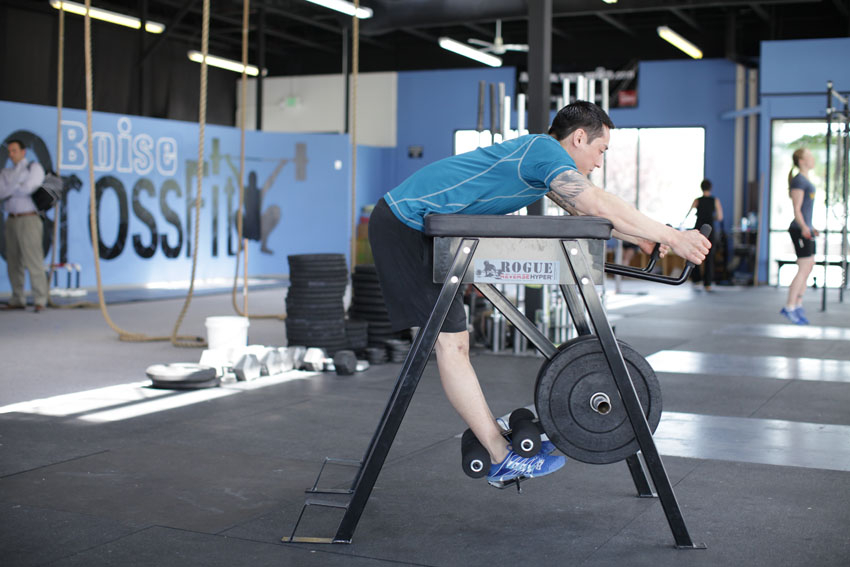 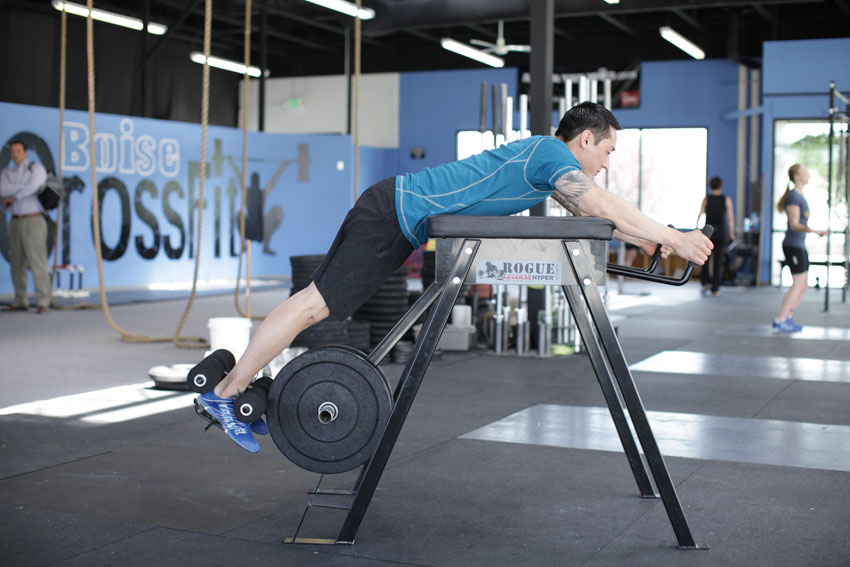 | 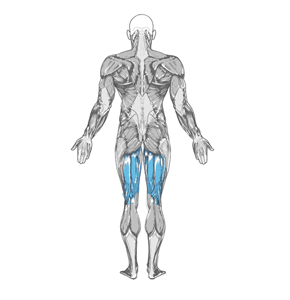 Hamstrings | Reverse Hyperextension | ["Reverse Hyper"] | [6,8] | 10 | 0 | Intermediate | 0 | Pull | 1) Place your feet between the pads after loading an appropriate weight. Lay on the top pad, allowing your hips to hang off the back, while grasping the handles to hold your position. <br /> 2) To begin the movement, flex the hips, pulling the legs forward.<br /> 3) Reverse the motion by extending the hips, kicking the leg back. It is very important not to over-extend the hip on this movement, stopping short of your full range of motion.<br /> 4) Return by again flexing the hip, pulling the carriage forward as far as you can.<br /> 5) Repeat for the desired number of repetitions. <br /> | http://www.bodybuilding.com/exercises/detail/view/name/reverse-hyperextension | |||
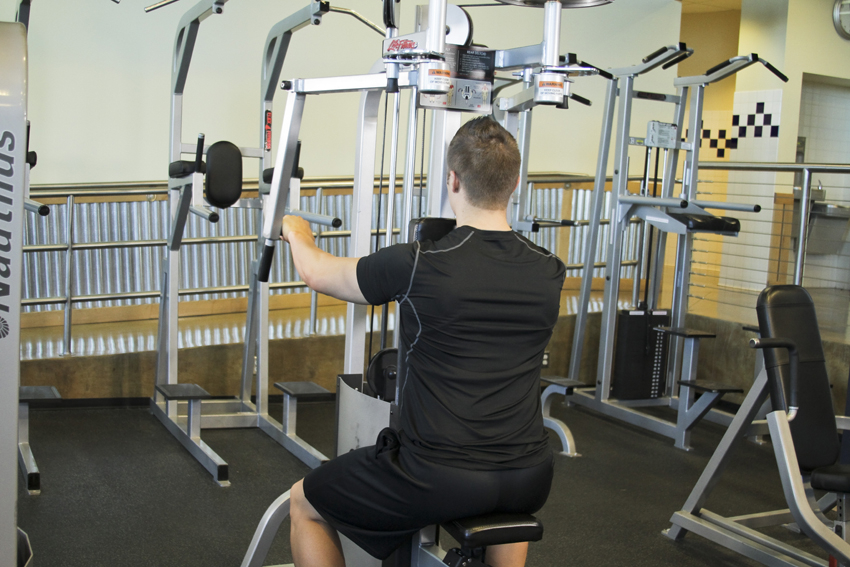 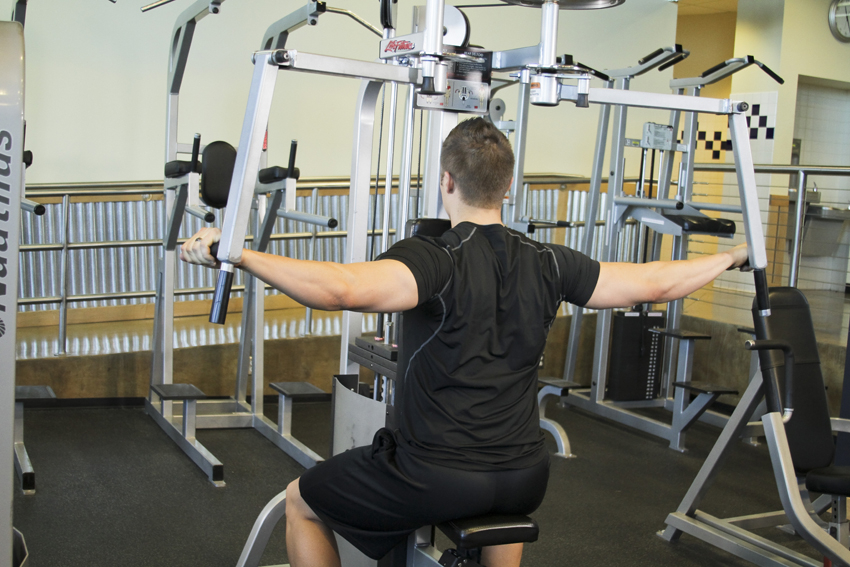 | 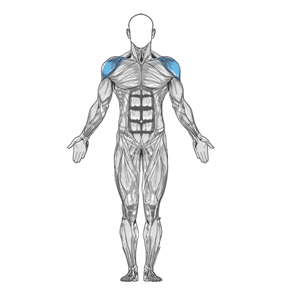 Shoulders | Reverse Machine Flyes | ["Rear Delt Machine Flyes"] | (not set) | 10 | 2 | Beginner | 0 | Pull | 1) Adjust the handles so that they are fully to the rear. Make an appropriate weight selection and adjust the seat height so the handles are at shoulder level. Grasp the handles with your hands facing inwards. This will be your starting position.<br /> 2) In a semicircular motion, pull your hands out to your side and back, contracting your rear delts.<br /> 3) Keep your arms slightly bent throughout the movement, with all of the motion occurring at the shoulder joint.<br /> 4) Pause at the rear of the movement, and slowly return the weight to the starting position. <br /> | http://www.bodybuilding.com/exercises/detail/view/name/reverse-machine-flyes | |||
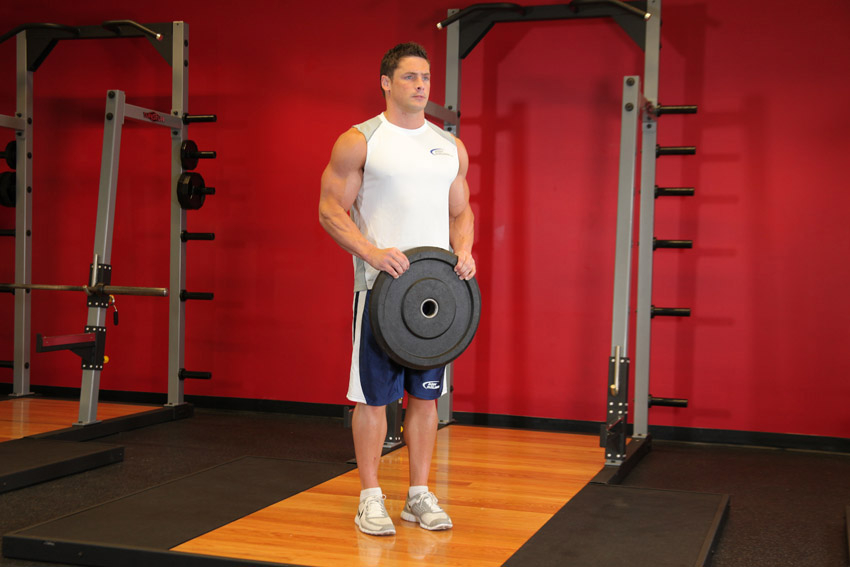 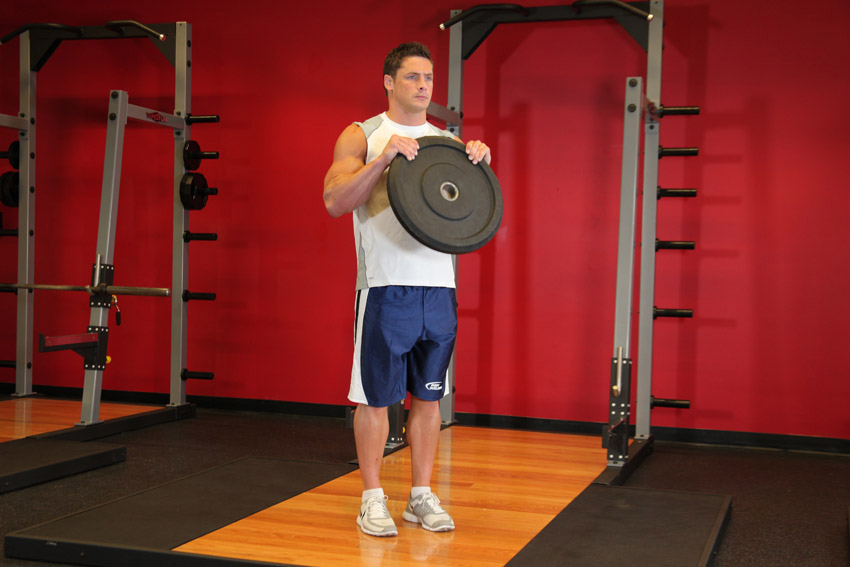 | 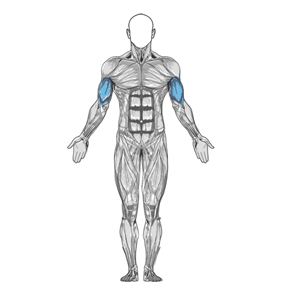 Biceps | Reverse Plate Curls | (not set) | [7] | 11 | 2 | Beginner | 0 | Pull | 1) Start by standing straight with a weighted plate held by both hands and arms fully extended. Use a pronated grip (palms facing down) and make sure your fingers grab the rough side of the plate while your thumb grabs the smooth side. <br /> Note:<br /> For the best results, grab the weighted plate at an 11:00 and 1:00 o'clock position.<br /> 2) Your feet should be shoulder width apart from each other and the weighted plate should be near the groin area. This is the starting position.<br /> 3) Slowly lift the plate up while keeping the elbows in and the upper arms stationary until your biceps and forearms touch while exhaling. The plate should be evenly aligned with your torso at this point.<br /> 4) Feel the contraction for a second and begin to lower the weight back down to the starting position while inhaling<br /> 5) Repeat for the recommended amount of repetitions.<br /> | Reverse Barbell Curl/ / Reverse Cable Curl | http://www.bodybuilding.com/exercises/detail/view/name/reverse-plate-curls | ||
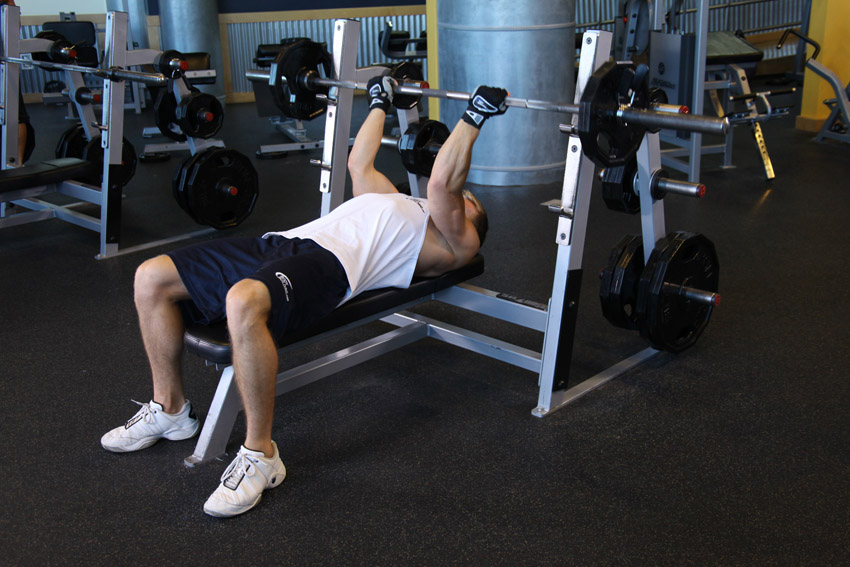 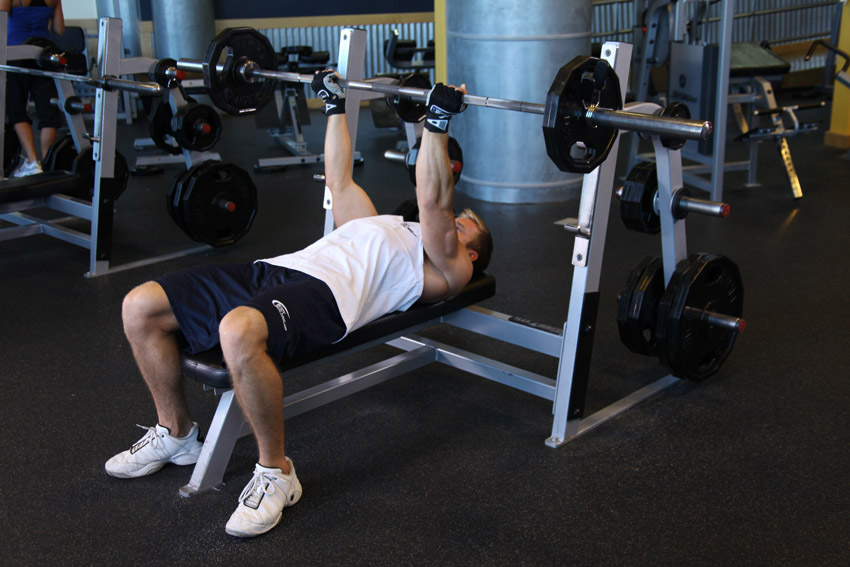 | 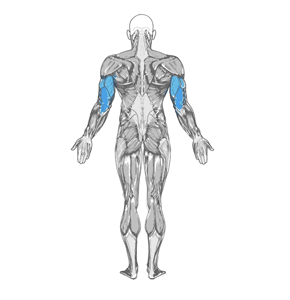 Triceps | Reverse Triceps Bench Press | (not set) | [4,1] | 2 | 1 | Intermediate | 0 | Push | 1) Lie back on a flat bench. Using a close, supinated grip (around shoulder width), lift the bar from the rack and hold it straight over you with your arms locked extended in front of you and perpendicular to the floor. This will be your starting position.<br /> 2) As you breathe in, come down slowly until you feel the bar on your middle chest. <br /> Tip:<br /> Make sure that as opposed to a regular bench press, you keep the elbows close to the torso at all times in order to maximize triceps involvement.<br /> 3) After a second pause, bring the bar back to the starting position as you breathe out and push the bar using your triceps muscles. Lock your arms in the contracted position, hold for a second and then start coming down slowly again. <br /> Tip:<br /> It should take at least twice as long to go down than to come up.<br /> 4) Repeat the movement for the prescribed amount of repetitions.<br /> 5) When you are done, place the bar back in the rack.<br /> <br /> Caution:<br /> If you are new at this exercise, it is advised that you use a spotter. If no spotter is available, then be conservative with the amount of weight used. Also, beware of letting the bar drift too far forward. You want the bar to fall around the area between the sternum and upper abs.<br /> <br /> Variation:<br /> This exercise can also be performed with an e-z bar using the inner handle as well as dumbbells.<br /> | Dip Machine/ / One Arm Floor Press | http://www.bodybuilding.com/exercises/detail/view/name/reverse-triceps-bench-press | ||
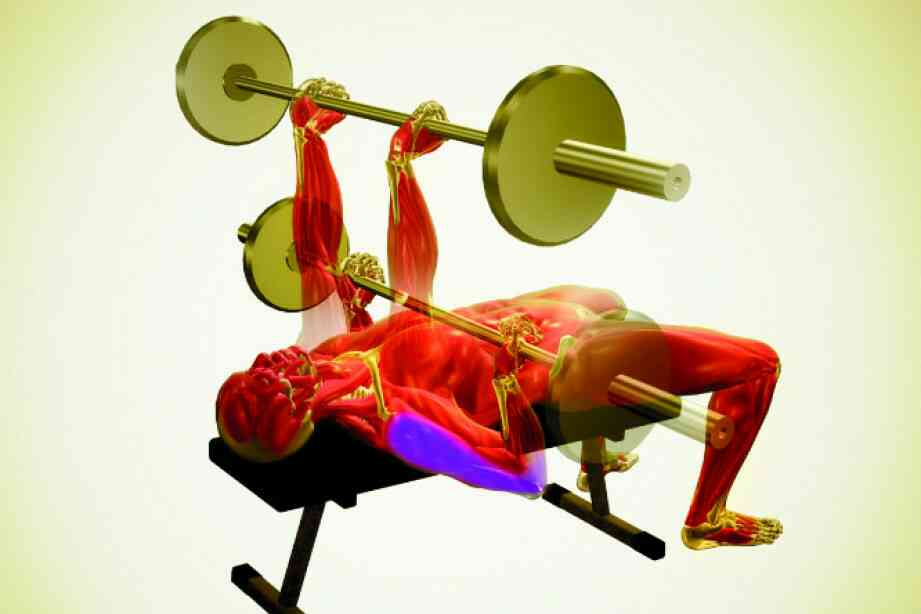 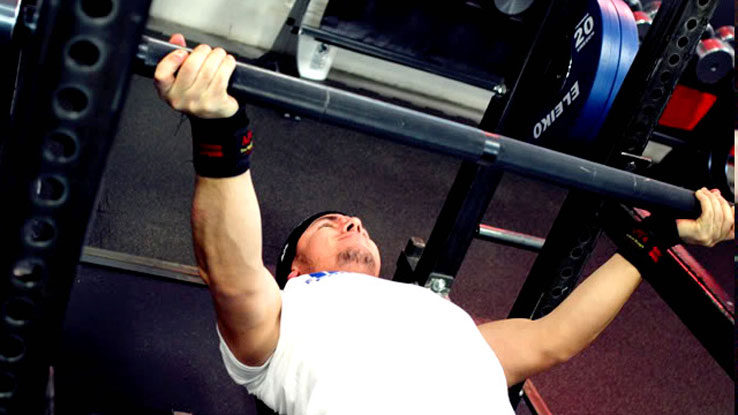 | Chest | Reverse-Grip Bench Press | ["RGBP"] | ["2"] | 2 | 1 | Intermediate | 0 | Push | Lying on a flat bench, grasp the bar with a supinated (reverse) grip, hands shoulder-width apart, and thumbs around the bar.<br /> Press the bar back up to the start position in a slight backward arc without letting your elbows flare out.<br /> Don’t lock out your elbows at the top of the rep; keep a bend in your arms, maintaining control of the weight at all times.<br /> With your elbows tucked in close to your sides, slowly lower the bar down to your lower pecs, and touch down softly.<br /> Press the bar back up to the start position in a slight backward arc without letting your elbows flare out.<br /> Don’t lock out your elbows at the top of the rep; keep a bend in your arms, maintaining control of the weight at all times.<br /> | Barbell Incline Bench Press Medium-Grip | https://www.t-nation.com/training/master-the-reverse-grip-bench-press | The conventional bench press is notorious for contributing to shoulder pain, elbow pain, wrist pain, and even forearm pain. This can lead to missed reps, a decline in strength, and interfere with other lifts. However, there's a viable yet often misunderstood alternative: the reverse-grip bench press. The Problem With The Bench Press When I bench press with the reverse grip, I always get asked, "Why?" Well, I had no other choice. Conventional bench presses done once or twice per week had gotten me stronger, but with bigger weights came bigger problems. First it was the shoulders. I'd have pain in my shoulders that shot down through both arms. This forced me to adjust my grip, bringing my hands in closer together. The closer grip, along with tucking the elbows to the body eased the shoulder pain, but it also caused a new problem – pain in my forearms. In fact, every variation led to other problems and my bench press stalled around the low 300-pound mark. Any more than that would aggravate the pain. That led me to a "drastic" decision: the RGBP. How To Perform The Reverse-Grip Bench Press The RGBP is easy to perform and not dangerous when performed correctly, even when done without a spotter. Set Up And Safety If you have a reliable training partner who can spot you, great. If not, you need to bench press in a power rack or squat rack to avoid becoming a statistic. I can't tell you how many times the safety pins in my rack have saved me. Set the safety pins or spotter arms so that they're level with your chest when you lie flat on the bench. You can test this out by lying on the bench, placing the bar on the safety pins, and rolling it above your chest. It should barely make any contact, if at all. Arching your back and elevating your chest should bring your chest just above the level of the safety pins. Set Up And Safety Setting the height of the safety pins at about the same height as your chest forces you to "reach up" with your chest in order for the bar to make contact with your body. You'll need to keep a tight arch to maintain this position, which will allow you to touch the bar to your chest without hitting the safety pins. If you happen to miss a rep, deflate your chest and the bar will land on the safety pins and make little contact with your body. Step 1: Grip Establish your grip first before positioning your body on the bench. Roll the bar forward on the J-hooks (this makes it easier to unrack the bar) and firmly grasp the bar with an underhand grip. The bar should sit in the heel of your palm directly above the bones of the forearms. In other words, it will rest across the meaty part of your hand on the thumb side across to the very bottom of the palm on the pinky side. Your wrist will be bent back very slightly. If you grasp the barbell in this fashion and look closely at your hands, wrists, and forearms, you'll notice that your hands are in a slight angle. It's almost like you have an underhand V-grip on a straight bar. Another way to think of it is it's almost like grabbing the bottom half of a steering wheel with two hands. Your hands aren't fully rotated up to a point where they're in line with the bar, but they're slightly angled. You'll want to get a bit of this angled grip on the bar instead of a completely supine grip as it'll allow you to adjust your elbows during the lift so that they can stay under the bar. This is important in order to control the bar during the lift. You won't have as much elbow mobility compared to a pronated grip where you can tuck and flare your elbows easily, but it'll be enough to control the bar. Squeeze the bar hard so that it doesn't move around during the set. Wrists If you have the bar on the heel of your palm correctly, your wrists shouldn't be cocked backwards. If they are, there will be unnecessary strain on the wrists during the lift and you'll need to readjust your grip. Grip Width Grip width is something you're going to need to figure out for yourself. I tried a variety of widths before settling on what I currently use, which is having my index fingers on the bar markings. This makes the width similar to my regular bench press where I have my pinkies on the smooth marking of the bar. Elbows You should also notice that your elbows are approximately facing towards your feet throughout the RGBP, even while grabbing the bar when it's still on the J-hooks. Step 2: Getting Your Body In Position Body positioning may be slightly different from the traditional bench press. In the regular bench press, your eyes are usually directly under the barbell. If you take this position for the reverse-grip bench press, you'll find that it's very difficult to unrack and re-rack the bar by yourself. Do this instead: position your body so that your mouth is directly under the bar. Getting Your Body In Position This position will make it easier to press the bar off the J-hooks and bring it into position to bench press. Firmly plant your feet on the ground, and then pull yourself down on the bench while maintaining the grip on the bar. Once your body is in position with the barbell over your mouth, expand your chest, pull the shoulders back, and arch the upper back. Then apply pressure into the ground with your legs to drive the hips up while attempting to keep as little contact with the bench as possible. Also, as you set your position on the bench while maintaining a firm grip on the bar, you'll notice that the heels of your palms will automatically position themselves directly under the bar (if they're not there already). This allows you to apply force directly up into the bar, making it easy to unrack without a hand-off. Shrugging Shoulders Shrugging Shoulders The secret technique of getting ready to unrack the bar is to shrug the shoulders towards the ears before starting the set. This will help get the shoulders and elbows into a position that's directly under the bar, setting yourself up perfectly to unrack the bar. Step 3: Unracking The Bar (By Yourself) The most common problem with the RGBP is figuring out how to unrack the bar. If you've set up correctly, it's easy. The keys: Heels of the palms underneath the bar. Positioning of the body so that your mouth is directly under the bar. Shrugging your shoulders towards your ears before you unrack. If you've set up your body correctly, established the reverse grip with the heels of your palms under the bar, and shrugged your shoulders so that they're as close to under the bar as possible, all you really need to do is extend the elbows. Take a big breath and hold it. While applying pressure to the bar with the heels of your palms, extend your arms and bring the bar directly over your shoulders. Make sure you keep your shoulders in place and only use your triceps to get the bar off the J-hooks. Unracking The Bar 1 Unracking The Bar 2 If you see that the bar comes off the J-hooks but starts moving backwards as you try to unrack it, your body position is likely out of place. This happens because your body is too far forward (towards the foot of the bench) and you don't have the top of your shoulders under the bar. Readjust your body position by moving back on the bench and try again. If you position yourself on the bench correctly, the bar is only a few inches away from the J-hooks when you unrack the barbell. When you re-rack the bar, it should only move back a few inches onto the J-hooks. If you do this correctly, you'll find that all you need to do is tilt the bar forward slightly to get it into position. Step 4: Bringing The Bar Down Take the time to control the barbell. On the descent, the bar will make a bigger arc compared to a regular bench press and it will probably touch a point on your chest that's a little lower than your regular bench press. It's because the humerus (upper arm) and elbows are closer to the body and the angle of your humerus and your body is smaller. Bringing The Bar Down Lower the bar slowly until it touches a point just below your nipples. You'll notice as you lower the bar that your elbows will naturally tuck to the sides. This makes it easier to contract your lats and use them during the lift. Step 5: Pressing It Up When you press the bar up, don't press it backwards towards your face. Instead, try focusing on pressing it up in a straight line above your chest. Focus your eyes on a "target" located on the ceiling and then press the bar into that point. If the bar goes in front of that target (in other words, towards your head), you're pressing the bar too far back and risk losing control. Even though you're trying to press in a straight line, in reality the bar will arc backwards slightly. It'll move from below the nipple line at the bottom position to directly above the shoulders at the top position. Pressing It Up Attempting to press straight up will prevent the bar from drifting backwards too far and too fast and will allow you to have control of the bar throughout the concentric phase of the lift. For the RGBP, I've found that if the bar drifts backwards towards my head, I need to lock it out ASAP. Sometimes I'm successful, and other times the bar may have drifted too far back and either I press it up hitting the J-hooks or it comes down crashing onto the safety pins. Step 6: Re-racking After you've finished your set, re-racking the bar should be as simple as tilting your arms slightly backwards so that the barbell lands just above the J-hooks. Again, if you've set up properly, the distance from the J-hooks to the lockout position is only a few inches. Putting It Altogether Here's what the RGBP looks like, filmed at three different angles: Now let's look at a different angle. This one also demonstrates how the bar can drift backwards during a set if it's not pressed as "straight up" as possible, causing it to hit the J-hooks on the ascent. You'll also see the importance of using the safety pins. How To Implement The RGBP Into Your Training I only started doing the RGBP after the regular bench press became too painful. If you experience pain from bench presses, do the RGBP exclusively. If you don't experience pain from bench presses but still want to try it out, there are three situations where you can use it without making radical changes to your existing regimen. 1. Learn The RGBP During Warm-Up Sets Use the RGBP as a warm-up for the regular bench press. Doing so ensures you'll be using a light weight to learn a new exercise, while at the same time preparing you for heavier bench presses. Start with an empty bar and gradually add weight until you hit your work sets. 2. Add The RGBP During Back-Off Sets You can implement the RGBP by adding it to the end of your bench press workout as back-off sets. Just go with a lighter weight and practice the movement. The problem with this is that it'll be difficult to determine what weight is light enough. 3. Warm-Up And Back-Off Sets Using The RGBP Do both approaches – warm-up using the RGBP, do your heavier main sets with the regular bench press, and finish off with back-off sets using the RGBP. Example Let's say someone has planned to do a bench press workout with 275 pounds for 3 sets of 5 reps. Reverse-Grip Bench Press (Warm Up) 45 pounds x 10 135 pounds x 5 185 pounds x 3 Bench Press 225 pounds x 2 275 pounds x 3 x 5 Reverse-Grip Bench Press (Back-Off Sets) 135 pounds x 2 x 5 Repetition is the mother of all skill, and if you want to get good at the RGBP you'll need to do it a lot. It's well worth it. The RGBP has allowed me to blast through old sticking points without pain. It can do the same for you. | |
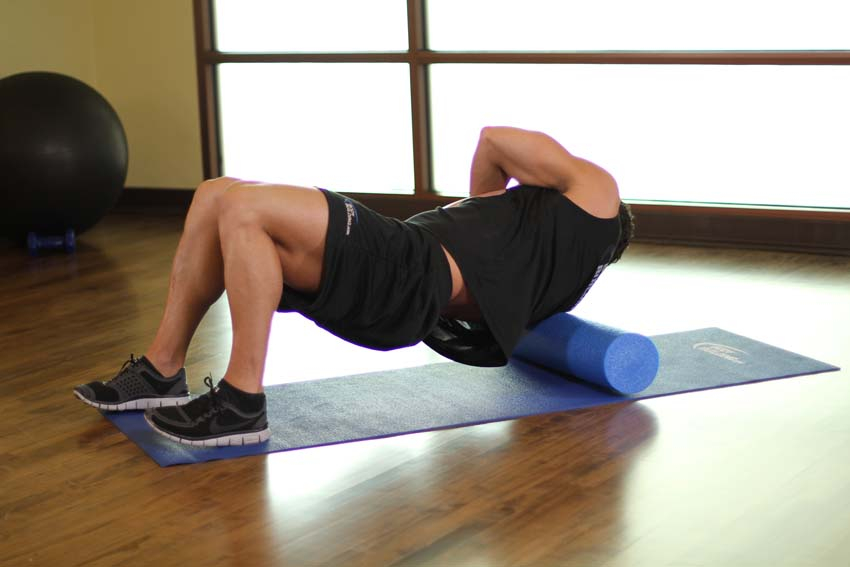 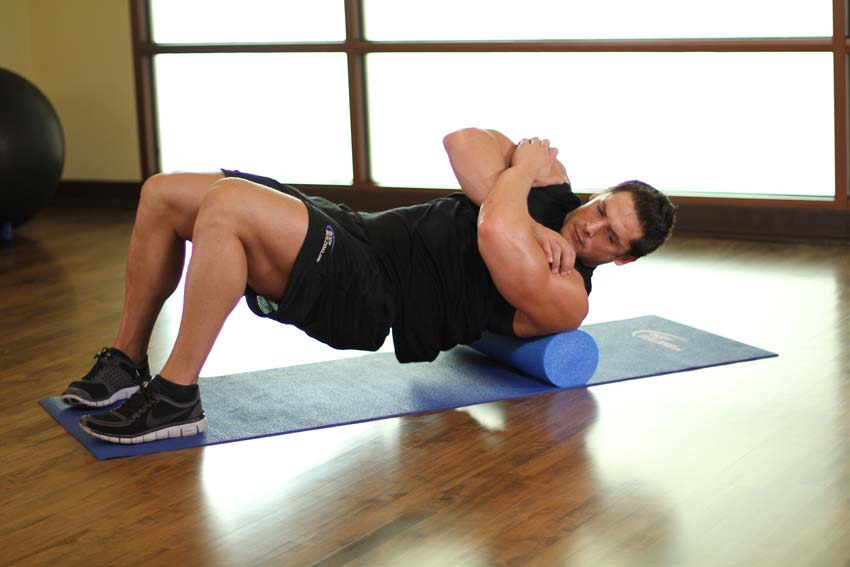 | 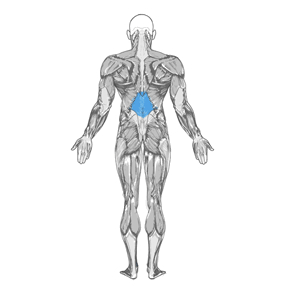 Middle Back | Rhomboids-SMR | ["Foam Roll Upper Back"," Myofascial Release Rhomboids"] | [15] | 8 | 0 | Intermediate | 0 | Static | 1) Lay down with your back on the floor. Place a foam roll underneath your upper back, and cross your arms in front of you, protracting your shoulders. This will be your starting position.<br /> 2) Raise your hips off of the ground, placing your weight onto the foam roll. Shift your weight to one side at a time, rolling over your middle and upper back. Pause at points of tension for 10-30 seconds. <br /> | http://www.bodybuilding.com/exercises/detail/view/name/rhomboids-smr | |||
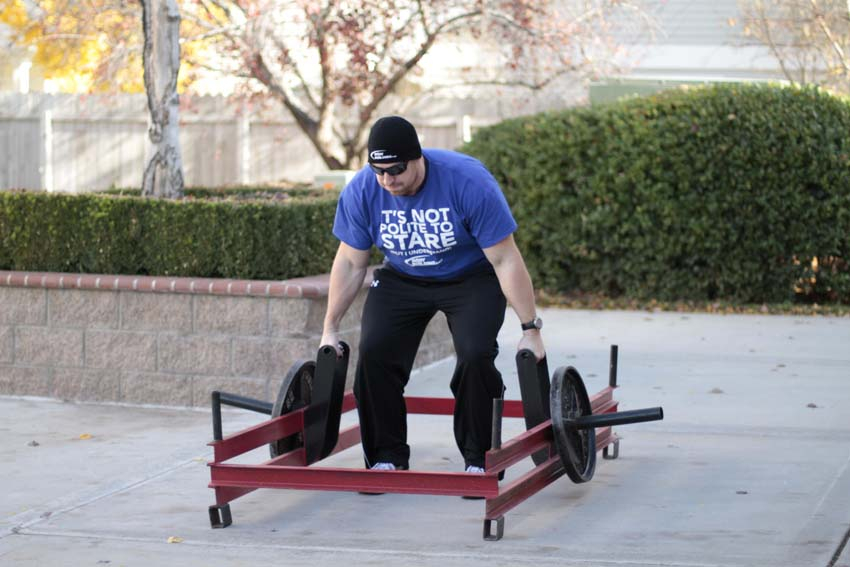 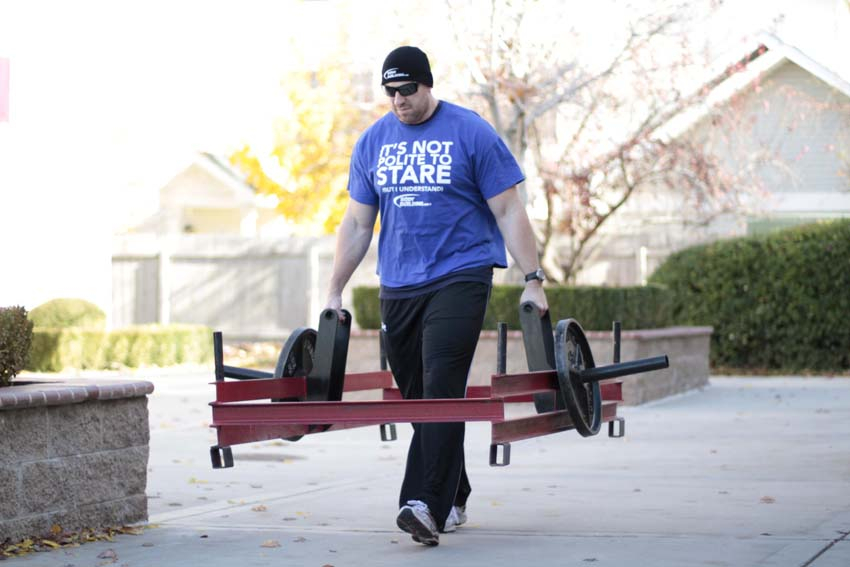 | 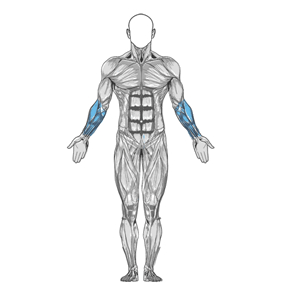 Forearms | Rickshaw Carry | ["Frame Carry"] | [5,6,8,9,11,14,15] | 11 | 1 | Intermediate | 1 | None | 1) Position the frame at the starting point, and load with the appropriate weight. Standing in the center of the frame, begin by gripping the handles and driving through your heels to lift the frame. Ensure your chest and head are up and your back is straight.<br /> 2) Immediately begin walking briskly with quick, controlled steps. Keep your chest up and head forward, and make sure you continue breathing. Bring the frame to the ground after you have reached the end point. <br /> | Farmer's Walk | http://www.bodybuilding.com/exercises/detail/view/name/rickshaw-carry | ||
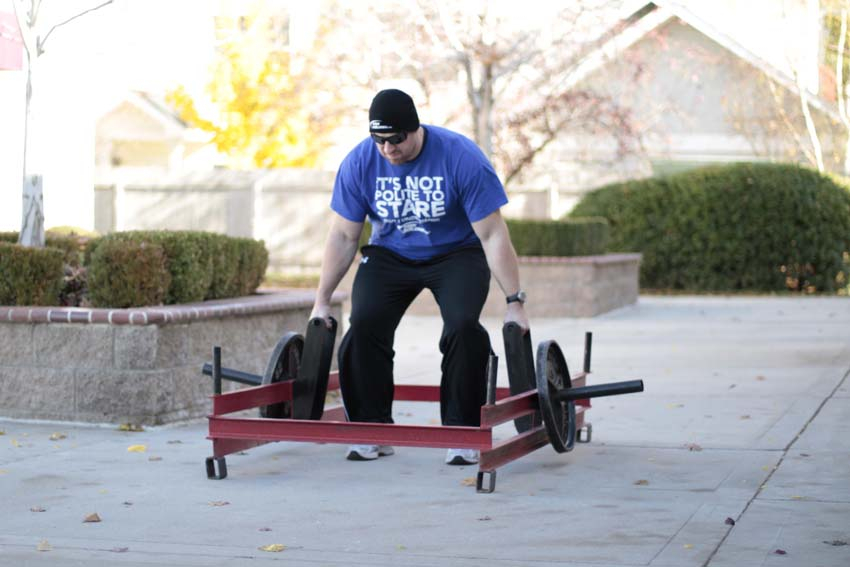 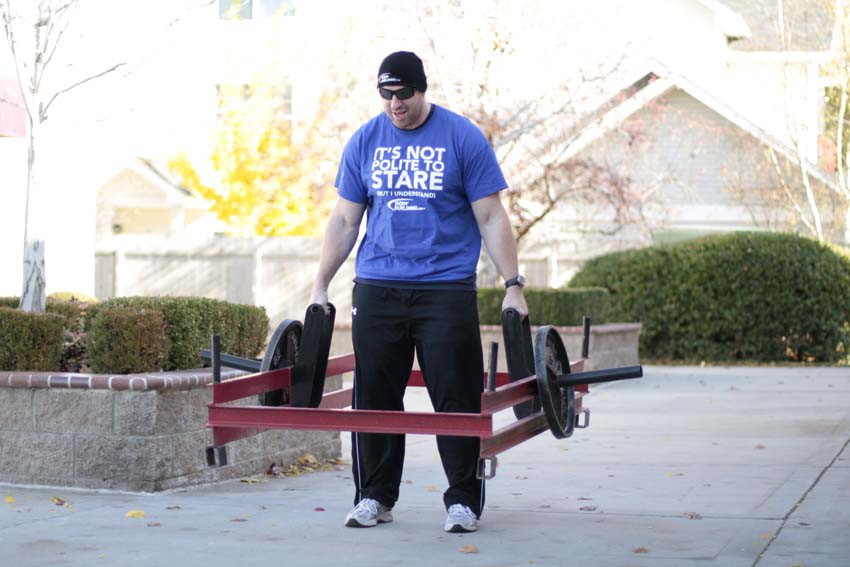 | 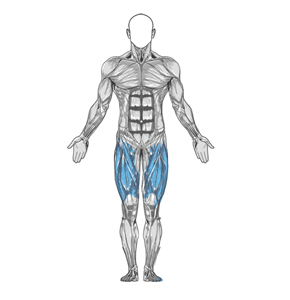 Quadriceps | Rickshaw Deadlift | ["Frame Deadlift"] | [7,8,9,11,15] | 11 | 1 | Intermediate | 1 | Pull | 1) Load the frame with the desired weight. Center yourself between the handles. You feet should be about hip width apart. Bend at the hips to grip the handles, allowing your shoulder blades to protract.<br /> 2) With your feet and your grip set, take a big breath and then lower your hips and flex the knees. Look forward with your head, keep your chest up and your back arched, and begin driving through the heels to move the weight upward. As the weight comes up, pull your shoulder blades together as you drive your hips forward.<br /> 3) Lower the weight by bending at the hips and guiding it to the ground.<br /> | http://www.bodybuilding.com/exercises/detail/view/name/rickshaw-deadlift- | |||
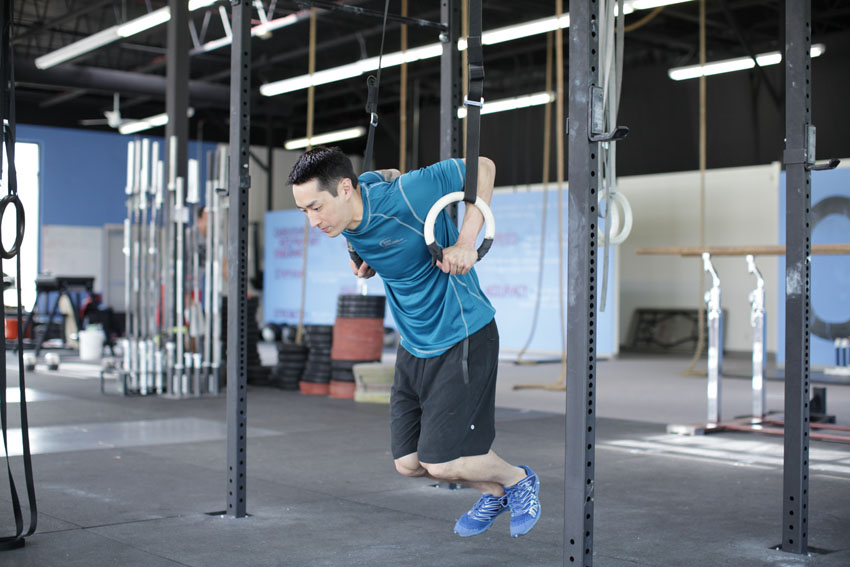 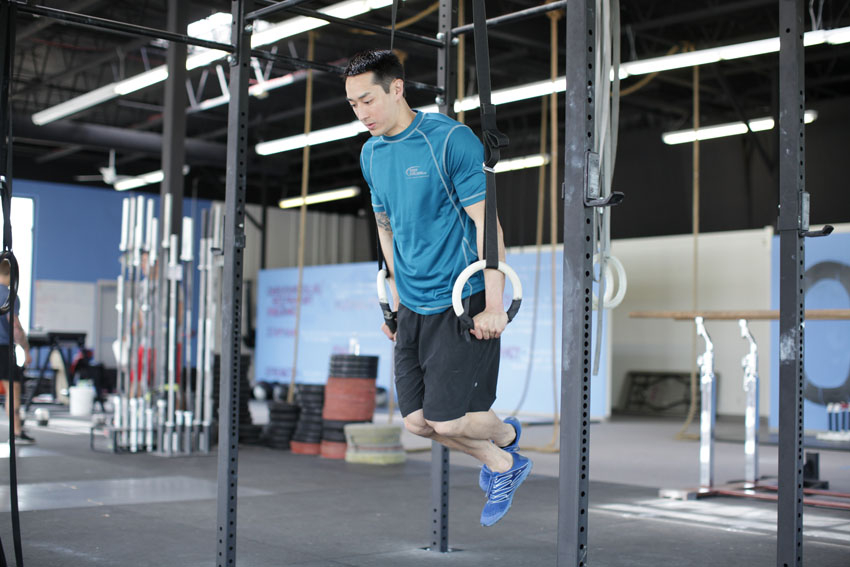 | 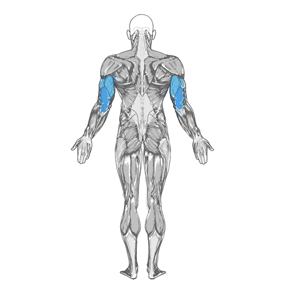 Triceps | Ring Dips | (not set) | [4,1] | 11 | 1 | Intermediate | 0 | Push | 1) Grip a ring in each hand, and then take a small jump to help you get into the starting position with your arms locked out.<br /> 2) Begin by flexing the elbow, lowering your body until your arms break 90 degrees. Avoid swinging, and maintain good posture throughout the descent.<br /> 3) Reverse the motion by extending the elbow, pushing yourself back up into the starting position.<br /> 4) Repeat for the desired number of repetitions. <br /> | http://www.bodybuilding.com/exercises/detail/view/name/ring-dips | |||
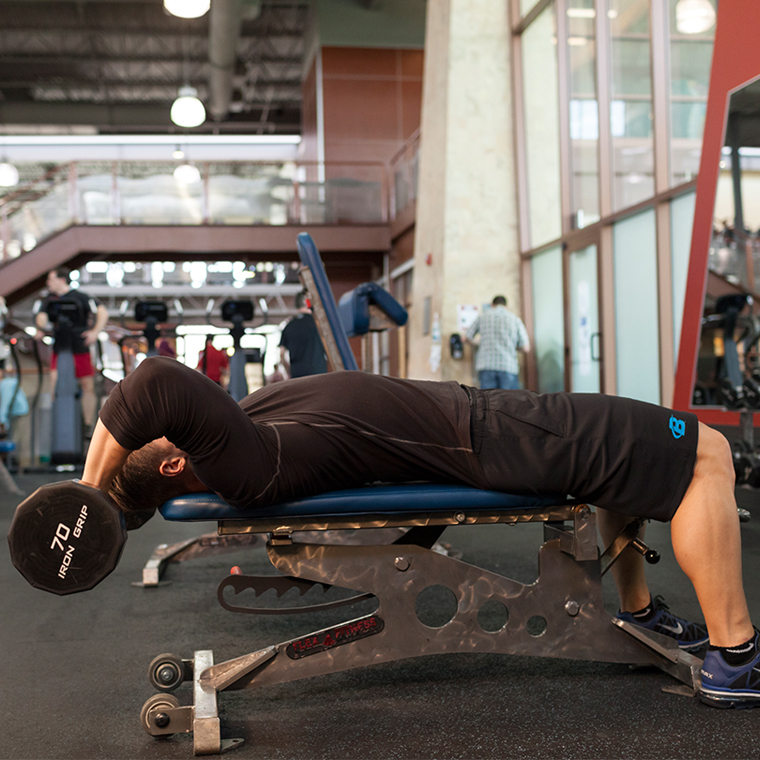 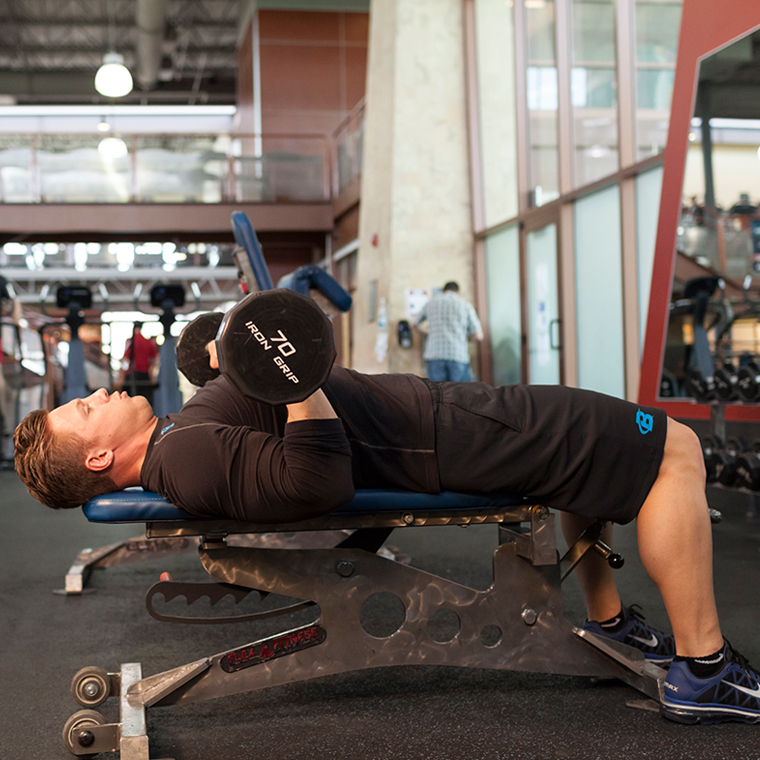 | 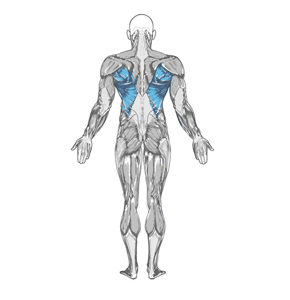 Lats | Rockers (Pullover To Press) Straight Bar | (not set) | [4,1,2] | 2 | 1 | Intermediate | 0 | Pull | 1) Lay on a flat bench with your feet flat on the floor. Hold a barbell on your chest with a shoulder-width, pronated grip. This will be your starting position. <br /> 2) Keeping the elbows bent to about 90 degrees, rotate the barbell over and behind your head. <br /> 3) Return the barbell to your chest, again keeping the elbows again fixed at the same angle. <br /> 4) Press the barbell straight up by extending the elbows, and then return the weight to the starting position. <br /> | http://www.bodybuilding.com/exercises/detail/view/name/rockers-pullover-to-press-straight-bar | |||
 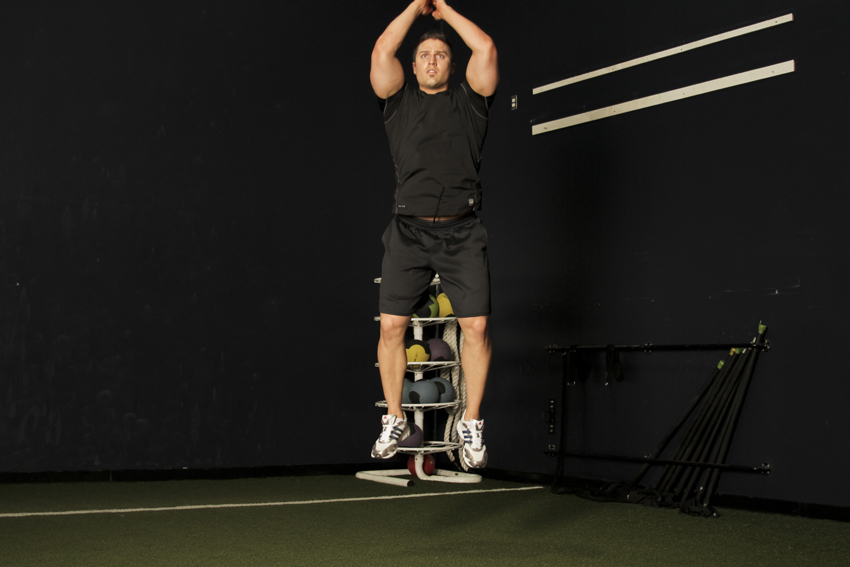 | 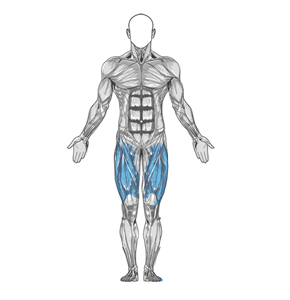 Quadriceps | Rocket Jump | (not set) | [6,9] | 0 | 1 | Beginner | 0 | Push | 1) Begin in a relaxed stance with your feet shoulder width apart and hold your arms close to the body.<br /> 2) To initiate the move, squat down halfway and explode back up as high as possible.<br /> 3) Fully extend your entire body, reaching overhead as far as possible. As you land, absorb your impact through the legs. <br /> | http://www.bodybuilding.com/exercises/detail/view/name/rocket-jump |
Play Video
Loading, please wait...